Sunday, March 31, 2013
Making the Battery "Packs"
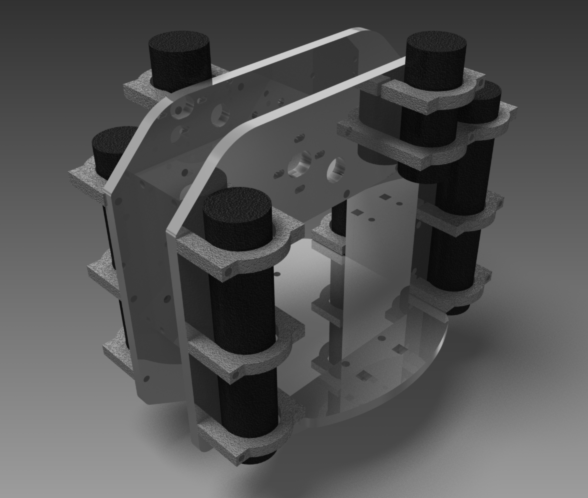
Time to make a battery pack. A very oddly shaped battery pack. Before I did any soldering, I had a good discussion with Shane and read a bit about how Charles made his battery packs for his various electric vehicles. I also sketched up a method for how I can assemble the batteries and then fold them after soldering the ribbon cables. Whiteboards help.
Labels:
Electric Orbit Wheels
Water Jetting!!!
My GRT (Graduate Resident Tutor), Kyle, on my floor, 5W (aka QED), works at CSAIL, has waterjet access, and knows OMAX.
OMAX is the software that converts an Autodesk or a SolidWorks file into a coordinate language the waterjet can use to cut out the part. The first time I went waterjetting with Kyle, we had to format all the parts in OMAX (a couple hours of work at the computer in the waterjet room). Later that night, I got the software to be able to finish all the formatting for future water jet trips.
I used OMAX Layout to set the quality of the cut (how slow the water jet cuts along the edges), set the cutting path (this is extremely important, because if the water jet cuts on the wrong side or in the wrong order, parts will be messed up).
Labels:
Electric Orbit Wheels
Saturday, March 30, 2013
CADing: Preparing for Water Jet
Since I didn't really elaborate on the CADing aspect of the laser cut acrylic orbit wheel prototype in the previous post, here's the story behind it:
I'm spending a lot of time refining my CAD files before printing them on the water jet. I can't use the free scrap stock in MITERS' pile of metal, because there aren't any water jetable 1/4 thick 8 inch squares. By "water jetable" I mean that there must be enough metal on the edges of the part in order to clamp it down to the machine. Therefore, I want to make the Autodesk files as detailed as possible to avoid wasting the nice 8" wide aluminum stock I got from McMaster.
Labels:
Electric Orbit Wheels
Picking out Motors and Batteries
As this is my very first electric vehicle and first big project at MIT, I didn't know what type of motor would work best. I talked with Ben, an experienced tinkerer, and he recommended a motor with low kv and pointed me towards HobbyKing. (The lower the Kv the more torque the motor can produce).
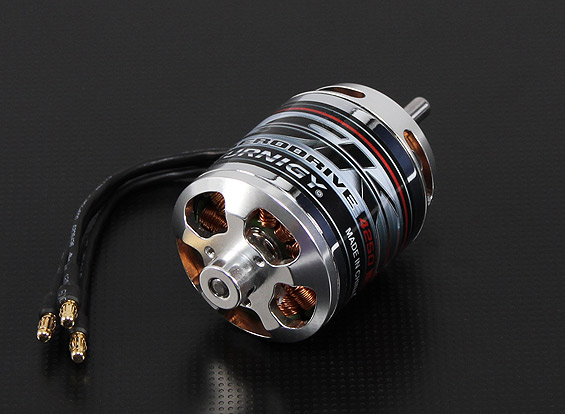
Chibikart's motors are Turnigy 5065-256Kv Brushless Outrunner Motor and have a can diameter of 49 mm. After looking on HobbyKing's website for a while I found a similar motor to Chibikart's. I ended up ordering three Turnigy 4250-350Kv Brushless Outrunner Motors with a can diameter of 42 mm. I left my browser on the HobbyKing page for awhile and they gave me a discount!
I'm thinking after I gear it for torque with the ring gear, the motor will be able to move a decent sized human at a decent rate (faster than orbit wheels without a motor that is).
Now that I got my motor picked out, I started thinking about batteries.
I decided to use the big A123 28650 Systems Lithium Nanophosphate cells. They seem to be a popular and common choice at MITERS.

I spent a lot of time researching what type of wheel I could use. I couldn't find many hubless wheels that were big enough to put my foot through (and even if I did they didn't have a ring gear inside). So I decided to build my own ring gear rim and pour the urethane rubber around it in a 3D printed cast.
And since I was planning on making my own wheel, I wanted to make "no crush wheels" so I could have some sort of shock absorption in the wheel itself.


In order to make these, I bought some molding urethane from Smooth-On. They sell 80A shore (a measure of how hard the material is) Urethane Rubber, which is very similar to the hardness of skateboard wheels, in little trial sizes and gallon sizes. I decided to purchase a trial size to test out if it would work for my purpose.
I'm planning on building one orbit wheel at a time (rather than simultaneously) to test how well the no crush wheel idea works. I could have some problems with getting the stiffness of the shock absorption just perfect. Otherwise, if it is too flimsy it will be like riding a flat tire, and if it's to stiff it won't be any different than a regular wheel. This way, I can incorporate any changes and improvements into the second wheel.
Chibikart's motors are Turnigy 5065-256Kv Brushless Outrunner Motor and have a can diameter of 49 mm. After looking on HobbyKing's website for a while I found a similar motor to Chibikart's. I ended up ordering three Turnigy 4250-350Kv Brushless Outrunner Motors with a can diameter of 42 mm. I left my browser on the HobbyKing page for awhile and they gave me a discount!
I'm thinking after I gear it for torque with the ring gear, the motor will be able to move a decent sized human at a decent rate (faster than orbit wheels without a motor that is).
Now that I got my motor picked out, I started thinking about batteries.
I decided to use the big A123 28650 Systems Lithium Nanophosphate cells. They seem to be a popular and common choice at MITERS.

I spent a lot of time researching what type of wheel I could use. I couldn't find many hubless wheels that were big enough to put my foot through (and even if I did they didn't have a ring gear inside). So I decided to build my own ring gear rim and pour the urethane rubber around it in a 3D printed cast.
And since I was planning on making my own wheel, I wanted to make "no crush wheels" so I could have some sort of shock absorption in the wheel itself.


In order to make these, I bought some molding urethane from Smooth-On. They sell 80A shore (a measure of how hard the material is) Urethane Rubber, which is very similar to the hardness of skateboard wheels, in little trial sizes and gallon sizes. I decided to purchase a trial size to test out if it would work for my purpose.
I'm planning on building one orbit wheel at a time (rather than simultaneously) to test how well the no crush wheel idea works. I could have some problems with getting the stiffness of the shock absorption just perfect. Otherwise, if it is too flimsy it will be like riding a flat tire, and if it's to stiff it won't be any different than a regular wheel. This way, I can incorporate any changes and improvements into the second wheel.
Labels:
Electric Orbit Wheels
Subscribe to:
Posts (Atom)


