

I was tempted to make this a full out Arduino project with pulse width modulation and all. However, I decided it would be quicker and more worth my time to use the RC radio receiver/transmitter system. The Hobby King RC system I used for my electric orbit wheels is basically a micro-controller built to do just this (servo controlled by potentiometer throttle at a distance).


Before committing to installing the servo in the gauge, I tested whether or not it actually worked. I used this handy little servo tester I found on the Stata loading dock. However, the tester didn't work (probably why it was left on the Stata loading dock).

Instead, I used my Electric Orbit Wheel radio receiver/transmitter system.
Now that I know it works, time to install it.
 |
| Either that's a huge thumb, or a tiny servo. |
Unfortunately, while in the process of taking the servo off the mechanism it was attached to, I broke the top gear. Without the top gear connection, the servo can not turn the servo horn (basically rendering the servo "kaput"). So I turned a small piece of nylon on the lathe to fix it up.
Here's the plan.
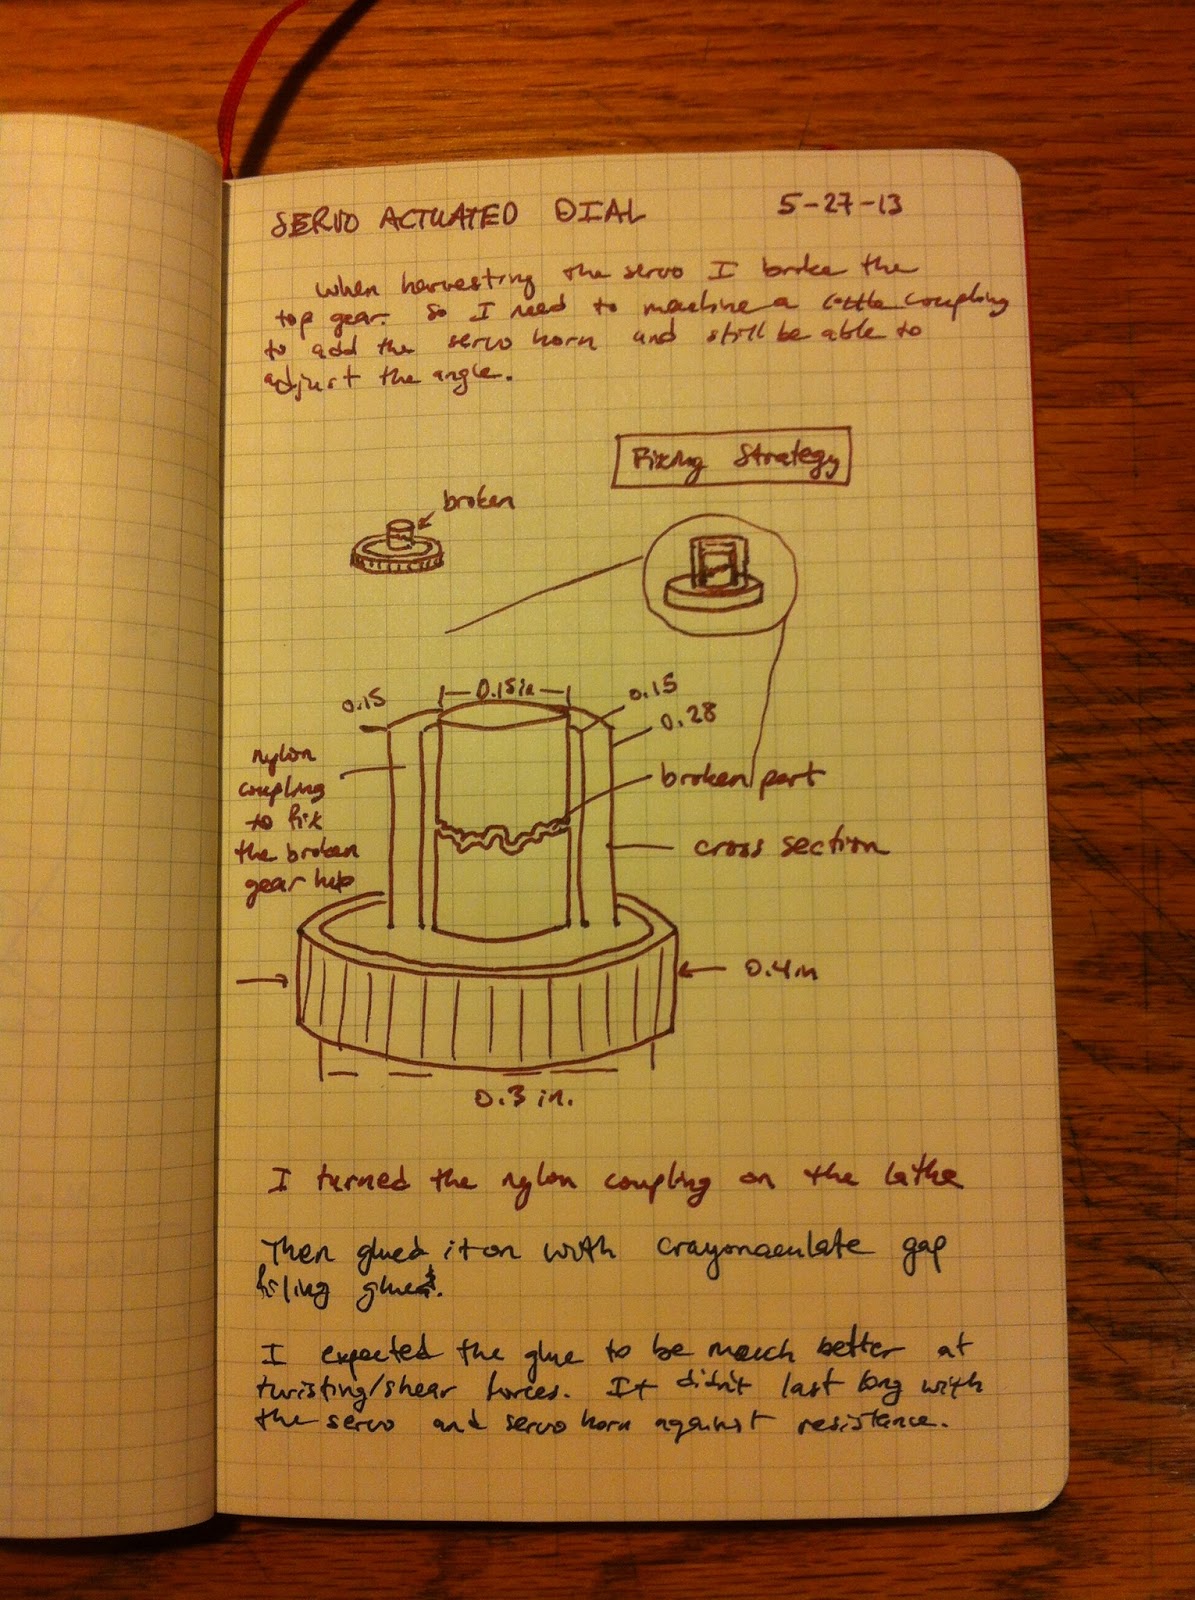
Because I miss the good old days in FIRST, I wrote a little engineering notebook style note to document my method for fixing the servo.


Removed the cover, press fit the nylon coupling onto the broken gear, drilled a bigger hole in the cover, used super glue to secure the servo horn (while still preserving the servo horn's changeable angle), and attached it to the remaining air pressure gauge parts to make a four-bar-linkage.
Nice reading about pressure gauge. I like Crystal Engineering pressure gauges for it's long lasting and durable efficiency.
ReplyDeletehttp://www.gekko-inc.com/store/843-xp2i-digital-pressure-gauges